用户模块
🪵 布局容器 >
布局容器-组件路由
实现:首页,健康百科,消息通知,我的,布局容器的搭建
- 基础组件
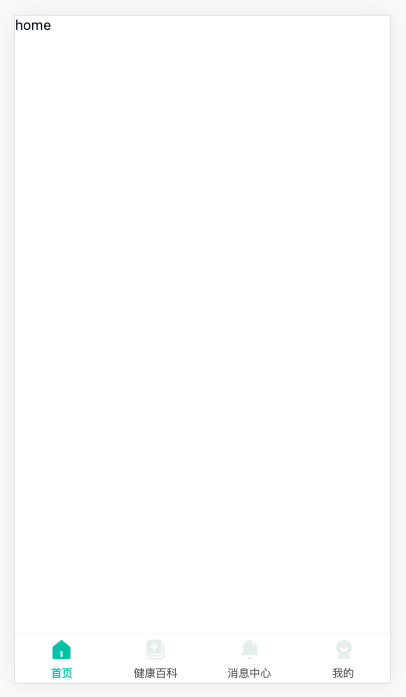
Home/index.vue
vue
<script setup lang="ts"></script>

<template>
  <div class="home-page">home</div>
</template>

<style lang="scss" scoped></style>
1
2
3
4
5
6
7
2
3
4
5
6
7
Article/index.vue
vue
<script setup lang="ts"></script>

<template>
  <div class="article-page">home</div>
</template>

<style lang="scss" scoped></style>
1
2
3
4
5
6
7
2
3
4
5
6
7
Notify/index.vue
vue
<script setup lang="ts"></script>

<template>
  <div class="notify-page">home</div>
</template>

<style lang="scss" scoped></style>
1
2
3
4
5
6
7
2
3
4
5
6
7
User/index.vue
vue
<script setup lang="ts"></script>

<template>
  <div class="user-page">home</div>
</template>

<style lang="scss" scoped></style>
1
2
3
4
5
6
7
2
3
4
5
6
7
- 布局容器
vue
<script setup lang="ts"></script>

<template>
  <div class="layout-page">
    <router-view></router-view>
    layout
  </div>
</template>

<style lang="scss" scoped></style>
1
2
3
4
5
6
7
8
9
10
2
3
4
5
6
7
8
9
10
- 路由配置
ts
  routes: [
    { path: '/login', component: () => import('@/views/Login/index.vue') },
    {
      path: '/',
      component: () => import('@/views/Layout/index.vue'),
      redirect: '/home',
      children: [
        { path: '/home', component: () => import('@/views/Home/index.vue') },
        { path: '/article', component: () => import('@/views/Article/index.vue') },
        { path: '/notify', component: () => import('@/views/Notify/index.vue') },
        { path: '/user', component: () => import('@/views/User/index.vue') }
      ]
    }
  ]
1
2
3
4
5
6
7
8
9
10
11
12
13
14
2
3
4
5
6
7
8
9
10
11
12
13
14
布局容器-底部tab栏
实现:底部tab的切换
步骤:
- 使用
tab-bar实现路由切换功能 - 给
tab-bar加上自定义图标
代码:
- 路由切换功能
html
    <van-tabbar route>
      <van-tabbar-item to="/home">首页</van-tabbar-item>
      <van-tabbar-item to="/article">健康百科</van-tabbar-item>
      <van-tabbar-item to="/notify">消息中心</van-tabbar-item>
      <van-tabbar-item to="/user">我的</van-tabbar-item>
    </van-tabbar>
1
2
3
4
5
6
2
3
4
5
6
- 自定义图标
vue
<script setup lang="ts"></script>

<template>
  <div class="layout-page">
    <router-view></router-view>
    <van-tabbar route>
      <van-tabbar-item to="/home">
        首页
        <template #icon="{ active }">
          <cp-icon :name="`home-index-${active ? 'active' : 'default'}`" />
        </template>
      </van-tabbar-item>
      <van-tabbar-item to="/article">
        健康百科
        <template #icon="{ active }">
          <cp-icon :name="`home-article-${active ? 'active' : 'default'}`" />
        </template>
      </van-tabbar-item>
      <van-tabbar-item to="/notify">
        消息中心
        <template #icon="{ active }">
          <cp-icon :name="`home-notice-${active ? 'active' : 'default'}`" />
        </template>
      </van-tabbar-item>
      <van-tabbar-item to="/user">
        我的
        <template #icon="{ active }">
          <cp-icon :name="`home-mine-${active ? 'active' : 'default'}`" />
        </template>
      </van-tabbar-item>
    </van-tabbar>
  </div>
</template>

<style lang="scss" scoped>
.layout-page {
  :deep() {
    .van-tabbar-item {
      &__icon {
        font-size: 21px;
      }
      &__text {
        font-size: 11px;
      }
      &:not(.van-tabbar-item--active) {
        color: var(--cp-text3);
      }
    }
  }
}
</style>
1
2
3
4
5
6
7
8
9
10
11
12
13
14
15
16
17
18
19
20
21
22
23
24
25
26
27
28
29
30
31
32
33
34
35
36
37
38
39
40
41
42
43
44
45
46
47
48
49
50
51
2
3
4
5
6
7
8
9
10
11
12
13
14
15
16
17
18
19
20
21
22
23
24
25
26
27
28
29
30
31
32
33
34
35
36
37
38
39
40
41
42
43
44
45
46
47
48
49
50
51
布局容器-访问权限控制
实现:需要登录的页面,需要判断是否有
token
vue-router 导航守卫文档
return '/login'跳转指定地址- 不返回,或者
return true就是放行 - 可以不是
next函数了
访问权限控制
router/index.ts
ts
// 访问权限控制
router.beforeEach((to) => {
  // 用户仓库
  const store = useUserStore()
  // 不需要登录的页面,白名单
  const wihteList = ['/login']
  // 如果没有登录且不在白名单内,去登录
  if (!store.user?.token && !wihteList.includes(to.path)) return '/login'
  // 否则不做任何处理
})
1
2
3
4
5
6
7
8
9
10
2
3
4
5
6
7
8
9
10
提问:
- 如果
/register也不需要登录,写哪里?const wihteList = ['/login', 'register']
布局容器-页面标题
实现:切换页面切换标题,扩展
vue-router的类型
- 给每一个路由添加 元信息 数据
router/index.ts
ts
const router = createRouter({
  history: createWebHistory(import.meta.env.BASE_URL),
  routes: [
    { path: '/login', component: () => import('@/views/Login/index.vue'), meta: { title: '登录' } },
    {
      path: '/',
      component: () => import('@/views/Layout/index.vue'),
      redirect: '/home',
      children: [
        {
          path: '/home',
          component: () => import('@/views/Home/index.vue'),
          meta: { title: '首页' }
        },
        {
          path: '/article',
          component: () => import('@/views/Article/index.vue'),
          meta: { title: '健康百科' }
        },
        {
          path: '/notify',
          component: () => import('@/views/Notify/index.vue'),
          meta: { title: '消息通知' }
        },
        {
          path: '/user',
          component: () => import('@/views/User/index.vue'),
          meta: { title: '个人中心' }
        }
      ]
    }
  ]
})
1
2
3
4
5
6
7
8
9
10
11
12
13
14
15
16
17
18
19
20
21
22
23
24
25
26
27
28
29
30
31
32
33
2
3
4
5
6
7
8
9
10
11
12
13
14
15
16
17
18
19
20
21
22
23
24
25
26
27
28
29
30
31
32
33
- 切换路由设置标题
router/index.ts
ts
router.afterEach((to) => {
  document.title = `${to.meta.title || ''}-优医问诊`
})
1
2
3
2
3
- 扩展元信息类型
types/vue-router.d.ts
ts
import 'vue-router'

declare module 'vue-router' {
  // 扩展 元信息类型
  interface RouteMeta {
    // 标题
    title?: string
  }
}
1
2
3
4
5
6
7
8
9
2
3
4
5
6
7
8
9
温馨提示
建议修改标题放 后置守卫 ,切换路由完成后修改标题
布局容器-加载进度
实现加载进度显示
- 由于都是懒加载的组件,在切换路由的时候需要加载资源,网速不好会 “静止”
- 需要等加载完路由对应组件资源,才会渲染页面结构,为了提高用户体验,加上进度条
使用步骤:
- 安装插件
bash
pnpm add nprogress
pnpm add @types/nprogress -D
1
2
2
ts
import NProgress from 'nprogress'
import 'nprogress/nprogress.css'
1
2
2
- 切换路由前开启
diff
router.beforeEach((to) => {
+  NProgress.start()
1
2
2
- 路由切换完毕后关闭
ts
router.afterEach((to) => {
  // 修改标题
  document.title = `${to.meta.title || ''}-优医问诊`
  NProgress.done()
})
1
2
3
4
5
2
3
4
5
- 插件配置,颜色修改
ts
NProgress.configure({
  showSpinner: false
})
1
2
3
2
3
main.scss
scss
#nprogress .bar {
  background-color: var(--cp-primary) !important;
}
1
2
3
2
3
🛖 个人中心 >
个人中心-用户信息类型
掌握:Pick 与 Omit 从现有类型中得到可复用类型
场景:
- 有
User对象类型,现在需要UserInfo类型,字段多一些 - 使用 交叉类型 可以复用
User类型,但是不需要 token 属性
Pick 与 Omit TS内置类型
- Pick 可以从一个对象类型中 取出某些属性
ts
type Person = {
  name: string
  age: number
}
type PickPerson = Pick<Person, 'age'>
// PickPerson === { age: string }
1
2
3
4
5
6
2
3
4
5
6
- Omit 可以从一个对象类型中 排出某些属性
ts
type Person = {
  name: string
  age: number
}
type OmitPerson = Omit<Person, 'age'>
// OmitPerson === { name: string }
1
2
3
4
5
6
2
3
4
5
6
落地代码:
ts
// 用户信息
export type User = {
  token: string
  id: string
  account: string
  mobile: string
  avatar: string
}

// 短信验证码类型
export type CodeType = 'login' | 'register' | 'changeMobile' | 'forgetPassword' | 'bindMobile'

// 个人信息
type OmitUser = Omit<User, 'token'>
export type UserInfo = OmitUser & {
  /** 关注 */
  likeNumber: number
  /** 收藏 */
  collectionNumber: number
  /** 积分 */
  score: number
  /** 优惠券 */
  couponNumber: number
  orderInfo: {
    /** 待付款 */
    paidNumber: number
    /** 待发货 */
    receivedNumber: number
    /** 待收货 */
    shippedNumber: number
    /** 已完成 */
    finishedNumber: number
  }
}
1
2
3
4
5
6
7
8
9
10
11
12
13
14
15
16
17
18
19
20
21
22
23
24
25
26
27
28
29
30
31
32
33
34
2
3
4
5
6
7
8
9
10
11
12
13
14
15
16
17
18
19
20
21
22
23
24
25
26
27
28
29
30
31
32
33
34
小结:
Pick作用?- 从类型对象中取出指定的属性类型
Omit作用?- 从类型对象中排出指定的属性类型,得到剩余的
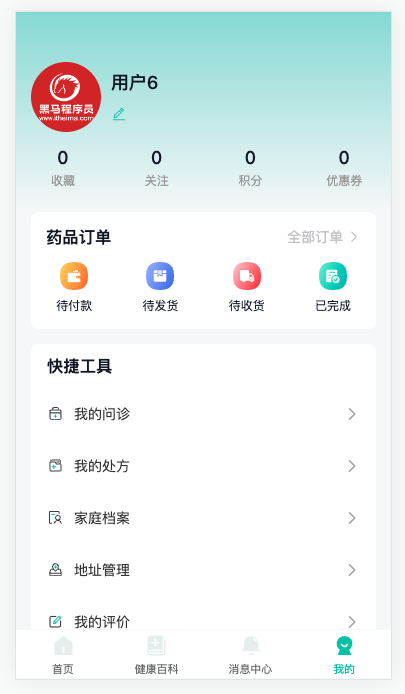
个人中心-头部展示
实现:头部个人信息展示与订单卡片布局
步骤:
- 熟悉基础结构
- 定义API函数
- 获取数据进行渲染
代码:
1)熟悉基础结构
vue
<script setup lang="ts"></script>

<template>
  <div class="user-page">
    <div class="user-page-head">
      <div class="top">
        <van-image
          round
          fit="cover"
          src="https://yanxuan-item.nosdn.127.net/ef302fbf967ea8f439209bd747738aba.png"
        />
        <div class="name">
          <p>用户907456</p>
          <p><van-icon name="edit" /></p>
        </div>
      </div>
      <van-row>
        <van-col span="6">
          <p>150</p>
          <p>收藏</p>
        </van-col>
        <van-col span="6">
          <p>23</p>
          <p>关注</p>
        </van-col>
        <van-col span="6">
          <p>270</p>
          <p>积分</p>
        </van-col>
        <van-col span="6">
          <p>3</p>
          <p>优惠券</p>
        </van-col>
      </van-row>
    </div>
    <div class="user-page-order">
      <div class="head">
        <h3>药品订单</h3>
        <router-link to="/order">全部订单 <van-icon name="arrow" /></router-link>
      </div>
      <van-row>
        <van-col span="6">
          <cp-icon name="user-paid" />
          <p>待付款</p>
        </van-col>
        <van-col span="6">
          <cp-icon name="user-shipped" />
          <p>待发货</p>
        </van-col>
        <van-col span="6">
          <cp-icon name="user-received" />
          <p>待收货</p>
        </van-col>
        <van-col span="6">
          <cp-icon name="user-finished" />
          <p>已完成</p>
        </van-col>
      </van-row>
    </div>
  </div>
</template>

<style lang="scss" scoped>
.user-page {
  background-color: var(--cp-bg);
  min-height: calc(100vh - 50px);
  padding: 0 15px 65px;
  // 头部
  &-head {
    height: 200px;
    background: linear-gradient(180deg, rgba(44, 181, 165, 0.46), rgba(44, 181, 165, 0));
    margin: 0 -15px;
    padding: 0 15px;
    .top {
      display: flex;
      padding-top: 50px;
      align-items: center;
      .van-image {
        width: 70px;
        height: 70px;
      }
      .name {
        padding-left: 10px;
        p {
          &:first-child {
            font-size: 18px;
            font-weight: 500;
          }
          &:last-child {
            margin-top: 10px;
            color: var(--cp-primary);
            font-size: 16px;
          }
        }
      }
    }
    .van-row {
      margin: 0 -15px;
      padding-top: 15px;
      p {
        text-align: center;
        &:first-child {
          font-size: 18px;
          font-weight: 500;
        }
        &:last-child {
          color: var(--cp-dark);
          font-size: 12px;
          padding-top: 4px;
        }
      }
    }
  }
  // 订单
  &-order {
    background-color: #fff;
    border-radius: 8px;
    margin-bottom: 15px;
    padding-bottom: 15px;
    .head {
      display: flex;
      justify-content: space-between;
      line-height: 50px;
      padding: 0 15px;
      a {
        color: var(--cp-tip);
      }
    }
    .van-col {
      text-align: center;
      .cp-icon {
        font-size: 28px;
      }
      p {
        font-size: 12px;
        padding-top: 4px;
      }
    }
  }
  // 分组
  &-group {
    background-color: #fff;
    border-radius: 8px;
    overflow: hidden;
    h3 {
      padding-left: 16px;
      line-height: 44px;
    }
    .van-cell {
      align-items: center;
    }
    .cp-icon {
      font-size: 17px;
      margin-right: 10px;
    }
  }
  .logout {
    display: block;
    margin: 20px auto;
    width: 100px;
    text-align: center;
    color: var(--cp-price);
  }
}
</style>
1
2
3
4
5
6
7
8
9
10
11
12
13
14
15
16
17
18
19
20
21
22
23
24
25
26
27
28
29
30
31
32
33
34
35
36
37
38
39
40
41
42
43
44
45
46
47
48
49
50
51
52
53
54
55
56
57
58
59
60
61
62
63
64
65
66
67
68
69
70
71
72
73
74
75
76
77
78
79
80
81
82
83
84
85
86
87
88
89
90
91
92
93
94
95
96
97
98
99
100
101
102
103
104
105
106
107
108
109
110
111
112
113
114
115
116
117
118
119
120
121
122
123
124
125
126
127
128
129
130
131
132
133
134
135
136
137
138
139
140
141
142
143
144
145
146
147
148
149
150
151
152
153
154
155
156
157
158
159
160
161
162
163
164
165
2)定义API函数
ts
import type { CodeType, User, UserInfo } from '@/types/user'

// ... 省略 ...

// 获取个人信息
export const getUserInfo = () => request<UserInfo>('/patient/myUser')
1
2
3
4
5
6
2
3
4
5
6
3)获取数据进行渲染
ts
import { getUserInfo } from '@/services/user'
import type { UserInfo } from '@/types/user'
import { onMounted, ref } from 'vue'

const user = ref<UserInfo>()
onMounted(async () => {
  const res = await getUserInfo()
  user.value = res.data
})
1
2
3
4
5
6
7
8
9
2
3
4
5
6
7
8
9
diff
+<div class="user-page" v-if="user">
    <div class="user-page-head">
      <div class="top">
+        <van-image round fit="cover" :src="user.avatar" />
        <div class="name">
+          <p>{{ user.account }}</p>
          <p><van-icon name="edit" /></p>
        </div>
      </div>
      <van-row>
        <van-col span="6">
+          <p>{{ user.collectionNumber }}</p>
          <p>收藏</p>
        </van-col>
        <van-col span="6">
+          <p>{{ user.likeNumber }}</p>
          <p>关注</p>
        </van-col>
        <van-col span="6">
+          <p>{{ user.score }}</p>
          <p>积分</p>
        </van-col>
        <van-col span="6">
+          <p>{{ user.couponNumber }}</p>
          <p>优惠券</p>
        </van-col>
      </van-row>
    </div>
    <div class="user-page-order">
      <div class="head">
        <h3>药品订单</h3>
        <router-link to="/order">全部订单 <van-icon name="arrow" /></router-link>
      </div>
      <van-row>
        <van-col span="6">
+          <van-badge :content="user.orderInfo.paidNumber || ''">
            <cp-icon name="user-paid" />
+          </van-badge>
          <p>待付款</p>
        </van-col>
        <van-col span="6">
+          <van-badge :content="user.orderInfo.shippedNumber || ''">
            <cp-icon name="user-shipped" />
+          </van-badge>
          <p>待发货</p>
        </van-col>
        <van-col span="6">
+          <van-badge :content="user.orderInfo.receivedNumber || ''">
            <cp-icon name="user-received" />
+          </van-badge>
          <p>待收货</p>
        </van-col>
        <van-col span="6">
+          <van-badge :content="user.orderInfo.finishedNumber || ''">
            <cp-icon name="user-finished" />
+          </van-badge>
          <p>已完成</p>
        </van-col>
      </van-row>
    </div>
  </div>
1
2
3
4
5
6
7
8
9
10
11
12
13
14
15
16
17
18
19
20
21
22
23
24
25
26
27
28
29
30
31
32
33
34
35
36
37
38
39
40
41
42
43
44
45
46
47
48
49
50
51
52
53
54
55
56
57
58
59
60
61
2
3
4
5
6
7
8
9
10
11
12
13
14
15
16
17
18
19
20
21
22
23
24
25
26
27
28
29
30
31
32
33
34
35
36
37
38
39
40
41
42
43
44
45
46
47
48
49
50
51
52
53
54
55
56
57
58
59
60
61
个人中心-快捷工具
实现:快捷工具栏目渲染
步骤:
- 准备初始化结构
- 准备初始化数据
- 遍历
代码: 1)准备初始化结构
html
    <div class="user-page-group">
      <h3>快捷工具</h3>
      <van-cell title="标题" is-link :border="false" >
        <template #icon><cp-icon name="user-tool-01" /></template>
      </van-cell>
      <van-cell title="标题" is-link :border="false" >
        <template #icon><cp-icon name="user-tool-01" /></template>
      </van-cell>
    </div>
1
2
3
4
5
6
7
8
9
2
3
4
5
6
7
8
9
2)准备初始化数据
ts
const tools = [
  { label: '我的问诊', path: '/user/consult' },
  { label: '我的处方', path: '/' },
  { label: '家庭档案', path: '/user/patient' },
  { label: '地址管理', path: '/user/address' },
  { label: '我的评价', path: '/' },
  { label: '官方客服', path: '/' },
  { label: '设置', path: '/' }
]
1
2
3
4
5
6
7
8
9
2
3
4
5
6
7
8
9
3)遍历
html
    <div class="user-page-group">
      <h3>快捷工具</h3>
      <van-cell
        v-for="(item, i) in tools"
        :key="item.label"
        :title="item.label"
        :to="item.path"
        is-link
        :border="false"
      >
        <template #icon><cp-icon :name="`user-tool-0${i + 1}`" /></template>
      </van-cell>
    </div>
1
2
3
4
5
6
7
8
9
10
11
12
13
2
3
4
5
6
7
8
9
10
11
12
13
个人中心-退出登录
实现:退出功能
步骤:
- 准备按钮
- 实现退出
- 确认框
- 清除token
- 跳转登录
代码:
1)准备按钮
html
<a class="logout" href="javascript:;">退出登录</a>
1
2)实现退出
ts
import { useUserStore } from '@/stores/index'

// ... 省略 ...

const store = useUserStore()
const router = useRouter()
const logout = async () => {
  await showConfirmDialog({
    title: '温馨提示',
    message: '您确认要退出优医问诊吗?'
  })
  store.delUser()
  router.push('/login')
}
1
2
3
4
5
6
7
8
9
10
11
12
13
14
2
3
4
5
6
7
8
9
10
11
12
13
14
🏥 家庭档案 >
家庭档案-路由与组件
实现:路由的配置与组件基础布局
- 路由
router/index.ts
ts
    {
      path: '/user/patient',
      component: () => import('@/views/User/PatientPage.vue'),
      meta: { title: '家庭档案' }
    }
1
2
3
4
5
2
3
4
5
注意是一级路由
- 组件
vue
<script setup lang="ts"></script>

<template>
  <div class="patient-page">
    <cp-nav-bar title="家庭档案"></cp-nav-bar>
    <div class="patient-list">
      <div class="patient-item">
        <div class="info">
          <span class="name">李富贵</span>
          <span class="id">321111********6164</span>
          <span>男</span>
          <span>32岁</span>
        </div>
        <div class="icon"><cp-icon name="user-edit" /></div>
        <div class="tag">默认</div>
      </div>
      <div class="patient-item">
        <div class="info">
          <span class="name">李富贵</span>
          <span class="id">321333********6164</span>
          <span>男</span>
          <span>32岁</span>
        </div>
        <div class="icon"><cp-icon name="user-edit" /></div>
      </div>
      <div class="patient-add">
        <cp-icon name="user-add" />
        <p>添加患者</p>
      </div>
      <div class="patient-tip">最多可添加 6 人</div>
    </div>
  </div>
</template>

<style lang="scss" scoped>
.patient-page {
  padding: 46px 0 80px;
}
.patient-list {
  padding: 15px;
}
.patient-item {
  display: flex;
  align-items: center;
  padding: 15px;
  background-color: var(--cp-bg);
  border-radius: 8px;
  margin-bottom: 15px;
  position: relative;
  border: 1px solid var(--cp-bg);
  transition: all 0.3s;
  overflow: hidden;
  .info {
    display: flex;
    flex-wrap: wrap;
    flex: 1;
    span {
      color: var(--cp-tip);
      margin-right: 20px;
      line-height: 30px;
      &.name {
        font-size: 16px;
        color: var(--cp-text1);
        width: 80px;
        margin-right: 0;
      }
      &.id {
        color: var(--cp-text2);
        width: 180px;
      }
    }
  }
  .icon {
    color: var(--cp-tag);
    width: 20px;
    text-align: center;
  }
  .tag {
    position: absolute;
    right: 60px;
    top: 21px;
    width: 30px;
    height: 16px;
    font-size: 10px;
    color: #fff;
    background-color: var(--cp-primary);
    border-radius: 2px;
    display: flex;
    justify-content: center;
    align-items: center;
  }
  &.selected {
    border-color: var(--cp-primary);
    background-color: var(--cp-plain);
    .icon {
      color: var(--cp-primary);
    }
  }
}
.patient-add {
  background-color: var(--cp-bg);
  color: var(--cp-primary);
  text-align: center;
  padding: 15px 0;
  border-radius: 8px;
  .cp-icon {
    font-size: 24px;
  }
}
.patient-tip {
  color: var(--cp-tag);
  padding: 12px 0;
}
.pb4 {
  padding-bottom: 4px;
}
</style>
1
2
3
4
5
6
7
8
9
10
11
12
13
14
15
16
17
18
19
20
21
22
23
24
25
26
27
28
29
30
31
32
33
34
35
36
37
38
39
40
41
42
43
44
45
46
47
48
49
50
51
52
53
54
55
56
57
58
59
60
61
62
63
64
65
66
67
68
69
70
71
72
73
74
75
76
77
78
79
80
81
82
83
84
85
86
87
88
89
90
91
92
93
94
95
96
97
98
99
100
101
102
103
104
105
106
107
108
109
110
111
112
113
114
115
116
117
定制化比较高的页面还是需要自己写,目前项目阶段大家知道结构即可。
家庭档案-展示患者
实现:患者的查询操作业务逻辑
步骤:
- 定义 api 函数,以及对应类型
- 实现查询患者业务
代码:
1)定义 api 函数,以及对应类型
- 定义类型
types/user.d.ts
ts
// 家庭档案-患者信息
export type Patient = {
  /** 患者ID */
  id: string
  /** 患者名称 */
  name: string
  /** 身份证号 */
  idCard: string
  /** 0不默认  1默认 */
  defaultFlag: 0 | 1
  /** 0 女  1 男 */
  gender: 0 | 1
  /** 性别文字 */
  genderValue: string
  /** 年龄 */
  age: number
}

// 家庭档案-患者信息列表
export type PatientList = Patient[]
1
2
3
4
5
6
7
8
9
10
11
12
13
14
15
16
17
18
19
20
2
3
4
5
6
7
8
9
10
11
12
13
14
15
16
17
18
19
20
- 定义API
services/user.ts
ts
import type { CodeType, PatientList, User, UserInfo } from '@/types/user'
// ... 省略 ...
// 获患者信息列表
export const getPatientList = () => request<PatientList>('/patient/mylist')
1
2
3
4
2
3
4
2)实现查询患者业务 User/PatientPage.vue
- 获取数据
ts
import { getPatientList } from '@/services/user'
import type { PatientList } from '@/types/user'
import { onMounted, ref } from 'vue'

// 1. 页面初始化加载数据
const list = ref<PatientList>([])
const loadList = async () => {
  const res = await getPatientList()
  list.value = res.data
}
onMounted(() => {
  loadList()
})
1
2
3
4
5
6
7
8
9
10
11
12
13
2
3
4
5
6
7
8
9
10
11
12
13
- 进行渲染
html
      <div class="patient-item" v-for="item in list" :key="item.id">
        <div class="info">
          <span class="name">{{ item.name }}</span>
          <span class="id">{{ item.idCard.replace(/^(.{6}).+(.{4})$/, '\$1********\$2') }}</span>
          <span>{{ item.genderValue }}</span>
          <span>{{ item.age }}岁</span>
        </div>
        <div class="icon"><cp-icon name="user-edit" /></div>
        <div class="tag" v-if="item.defaultFlag === 1">默认</div>
      </div>
      <div class="patient-add" v-if="list.length < 6">
1
2
3
4
5
6
7
8
9
10
11
2
3
4
5
6
7
8
9
10
11
身份证脱敏处理:/^(.{6}).+(.{4})$/
- 匹配第一个$1
^(.{6}) .+匹配中间字符- 匹配第二个$2
(.{4})$
家庭档案-v-model语法糖
掌握:vue3中v-model语法糖原理
回顾:
- vue2 中父子组件数据同步 父→子 子→父 如何实现?
v-model="count"或者xxx.sync="msg"
- v-model 语法糖 完整写法?
:value="count"和@input="count=$event"
- xxx.sync 语法糖 完整写法?
:xxx="msg"和@update:xxx="msg=$event"
现在:一个 v-model 指令搞定,不需要记忆两种语法
- vue3 中
v-model语法糖
html
<com-a v-model="count"></com-a>
<!-- 等价 -->
<com-a :modelValue="count" @update:modelValue="count=$event"></com-a>
1
2
3
2
3
html
<com-a v-model:msg="str"></com-a>
<!-- 等价 -->
<com-a :msg="str" @update:msg="str=$event"></com-a>
1
2
3
2
3
小结:
- vue3中只需要
v-model指令可以支持对个数据在父子组件同步,不再支持.sync语法。
提问:
- vue3 中 v-model 语法糖?
:modelValue="count"和@update:modelValue="count=$event"
- vue3 中 v-model:xxx 语法糖?
:xxx="count"和@update:xxx="count=$event"
cp-radio-btn 组件封装
实现:按钮组单选框组件
需求:
- 实现基础布局
- 实现组件的渲染
- 默认选中
- 切换选中
- 改用 v-model 写法
代码:
1)实现基础布局 components/CpRadioBtn.vue
vue
<script setup lang="ts"></script>

<template>
  <div class="cp-radio-btn">
    <a class="item" href="javascript:;">男</a>
    <a class="item" href="javascript:;">女</a>
  </div>
</template>

<style lang="scss" scoped>
.cp-radio-btn {
  display: flex;
  flex-wrap: wrap;
  .item {
    height: 32px;
    min-width: 60px;
    line-height: 30px;
    padding: 0 14px;
    text-align: center;
    border: 1px solid var(--cp-bg);
    background-color: var(--cp-bg);
    margin-right: 10px;
    box-sizing: border-box;
    color: var(--cp-text2);
    margin-bottom: 10px;
    border-radius: 4px;
    transition: all 0.3s;
    &.active {
      border-color: var(--cp-primary);
      background-color: var(--cp-plain);
    }
  }
}
</style>
1
2
3
4
5
6
7
8
9
10
11
12
13
14
15
16
17
18
19
20
21
22
23
24
25
26
27
28
29
30
31
32
33
34
2
3
4
5
6
7
8
9
10
11
12
13
14
15
16
17
18
19
20
21
22
23
24
25
26
27
28
29
30
31
32
33
34
diff
import CpNavBar from '@/components/CpNavBar.vue'
import CpIcon from '@/components/CpIcon.vue'
+import CpRadioBtn from '@/components/CpRadioBtn.vue'

declare module 'vue' {
  interface GlobalComponents {
    CpNavBar: typeof CpNavBar
    CpIcon: typeof CpIcon
+    CpRadioBtn: typeof CpRadioBtn
  }
}
1
2
3
4
5
6
7
8
9
10
11
2
3
4
5
6
7
8
9
10
11
2)实现组件的渲染
- 使用传入数组额方式动态展示需要显示的按钮
components/CpRadioBtn.vue
vue
<script setup lang="ts">
defineProps<{
  options: {
    label: string
    value: string | number
  }[]
}>()
</script>

<template>
  <div class="cp-radio-btn">
    <a class="item" href="javascript:;" v-for="item in options" :key="item.value">
      {{ item.label }}
    </a>
  </div>
</template>
1
2
3
4
5
6
7
8
9
10
11
12
13
14
15
16
2
3
4
5
6
7
8
9
10
11
12
13
14
15
16
User/PatientPage.vue
ts
const options = [
  { label: '男', value: 1 },
  { label: '女', value: 0 }
]
1
2
3
4
2
3
4
html
<cp-radio-btn :options="options"></cp-radio-btn>
1
3)默认选中
使用组件:User/PatientPage.vue
ts
const gender = ref(1)
1
html
<cp-radio-btn :options="options" :modelValue="gender"></cp-radio-btn>
1
定义组件:components/CpRadioBtn.vue
vue
<script setup lang="ts">
defineProps<{
  options: {
    label: string
    value: string | number
  }[]
  modelValue?: string | number
}>()
</script>

<template>
  <div class="cp-radio-btn">
    <a
      class="item"
      href="javascript:;"
      v-for="item in options"
      :key="item.value"
      :class="{ active: modelValue === item.value }"
    >
      {{ item.label }}
    </a>
  </div>
</template>
1
2
3
4
5
6
7
8
9
10
11
12
13
14
15
16
17
18
19
20
21
22
23
2
3
4
5
6
7
8
9
10
11
12
13
14
15
16
17
18
19
20
21
22
23
4)切换效果
使用组件:User/PatientPage.vue 暂时不管类型校验,这种写法不常用
html
            <cp-radio-btn
              :options="options"
              :modelValue="gender"
              @update:model-value="gender = $event"
            ></cp-radio-btn>
1
2
3
4
5
2
3
4
5
定义组件:components/CpRadioBtn.vue
ts
const emit = defineEmits<{
  (e: 'update:modelValue', value: string | number): void
}>()
const toggleItem = (value: string | number) => {
  // 触发自定义事件把数据给父组件
  emit('update:modelValue', value)
}
1
2
3
4
5
6
7
2
3
4
5
6
7
diff
    <a
      class="item"
      href="javascript:;"
      v-for="item in options"
      :key="item.value"
      :class="{ active: modelValue === item.value }"
+      @click="toggleItem(item.value)"
    >
      {{ item.label }}
    </a>
1
2
3
4
5
6
7
8
9
10
2
3
4
5
6
7
8
9
10
5)改用 v-model 写法
html
  <cp-radio-btn
    :options="options"
    v-model="gender"
  ></cp-radio-btn>
1
2
3
4
2
3
4
提问:
options作用是?- 提供可选项
v-model语法糖,拆分写法?:modelValue="count"和@update:modelValue="count=$event"
家庭档案-侧滑层显示隐藏
实现:使用 van-popup 完成侧边栏效果
需求:
- 使用 van-popup 组件,实现显示隐藏
- 不使用 v-model 实现父子数据同步,理解语法糖
- 扩展 cp-nav-bar 组件,支持自定义返回
- 绘制表单
代码:
1)使用 van-popup 组件,实现显示隐藏 User/PatientPage.vue
ts
// 2. 打开侧滑栏
const show = ref(false)
const showPopup = () => {
  show.value = true
}
1
2
3
4
5
2
3
4
5
html
<div class="patient-add" v-if="list.length < 6" @click="showPopup()">
1
html
    <!-- 侧边栏 -->
    <van-popup v-model:show="show" position="right">
      <cp-nav-bar title="添加患者" right-text="保存"></cp-nav-bar>
    </van-popup>
1
2
3
4
2
3
4
scss
.patient-page {
  padding: 46px 0 80px;
  :deep() {
    .van-popup {
      width: 80%;
      height: 100%;
    }
  }
}
1
2
3
4
5
6
7
8
9
2
3
4
5
6
7
8
9
- 不使用 v-model 实现父子数据同步,理解语法糖
html
    <van-popup :show="show" @update:show="show=$event" position="right">
      <cp-nav-bar title="添加患者" right-text="保存"></cp-nav-bar>
    </van-popup>
1
2
3
2
3
这种写法麻烦,知道写法即可,一般使用 v-model:show="show"
- 扩展 cp-nav-bar 组件,支持自定义返回
扩展 back 属性,如果有就执行 back 对应的函数。
diff
const router = useRouter()
const onClickLeft = () => {
+  if (props.back) {
+    return props.back()
+  }
  // 判断历史记录中是否有回退
  if (history.state?.back) {
    router.back()
  } else {
    router.push('/')
  }
}

// 2. 使用组件时候才能确定的功能:标题,右侧文字,点击右侧文字行为(props传入)
+const props = defineProps<{
  title?: string
  rightText?: string
+  back?: () => void
}>()
1
2
3
4
5
6
7
8
9
10
11
12
13
14
15
16
17
18
19
2
3
4
5
6
7
8
9
10
11
12
13
14
15
16
17
18
19
User/PatientPage.vue 全屏展示,空出导航栏
html
<cp-nav-bar :back="() => (show = false)" title="添加患者" right-text="保存"></cp-nav-bar>
1
scss
.patient-page {
  padding: 46px 0 80px;
  :deep() {
    .van-popup {
      width: 100%;
      height: 100%;
      padding-top: 46px;
      box-sizing: border-box;
    }
  }
}
1
2
3
4
5
6
7
8
9
10
11
2
3
4
5
6
7
8
9
10
11
4)绘制表单
html
      <van-form autocomplete="off" ref="form">
        <van-field label="真实姓名" placeholder="请输入真实姓名" />
        <van-field label="身份证号" placeholder="请输入身份证号" />
        <van-field label="性别" class="pb4">
          <!-- 单选按钮组件 -->
          <template #input>
            <cp-radio-btn :options="options"></cp-radio-btn>
          </template>
        </van-field>
        <van-field label="默认就诊人">
          <template #input>
            <van-checkbox :icon-size="18" round />
          </template>
        </van-field>
      </van-form>
1
2
3
4
5
6
7
8
9
10
11
12
13
14
15
2
3
4
5
6
7
8
9
10
11
12
13
14
15
小结:
- 属性可以传函数吗?
- 可以
- popup 组件怎么双向绑定?
- v-model:show
家庭档案-表单数据绑定
实现:患者信息录入的表单和绑定数据
需求:
- 绑定表单项数据
- 绑定复选框数据
- 打开侧滑栏重置表单
代码:User/PatientPage.vue
1)绑定数据 user.d.ts
ts
export type Patient = {
  id?: string
  name: string
  idCard: string
  defaultFlag: 0 | 1
  gender: 0 | 1
  genderValue?: string
  age?: number
}
1
2
3
4
5
6
7
8
9
2
3
4
5
6
7
8
9
PatientPage.vue
ts
import type { Patient, PatientList } from '@/types/user'
import { computed, onMounted, ref } from 'vue'
1
2
2
ts
const patient = ref<Patient>({
  name: '',
  idCard: '',
  gender: 1,
  defaultFlag: 0
})
1
2
3
4
5
6
2
3
4
5
6
2)绑定复选框数据
ts
// 默认值需要转换
const defaultFlag = computed({
  get() {
    return patient.value.defaultFlag === 1 ? true : false
  },
  set(value) {
    patient.value.defaultFlag = value ? 1 : 0
  }
})
1
2
3
4
5
6
7
8
9
2
3
4
5
6
7
8
9
html
        <van-field
          v-model="patient.name"
          label="真实姓名"
          placeholder="请输入真实姓名"
        />
        <van-field
          v-model="patient.idCard"
          label="身份证号"
          placeholder="请输入身份证号"
        />
        <van-field label="性别" class="pb4">
          <!-- 单选按钮组件 -->
          <template #input>
            <cp-radio-btn
              v-model="patient.gender"
              :options="options"
            ></cp-radio-btn>
          </template>
        </van-field>
        <van-field label="默认就诊人">
          <template #input>
            <van-checkbox v-model="defaultFlag" :icon-size="18" round />
          </template>
        </van-field>
1
2
3
4
5
6
7
8
9
10
11
12
13
14
15
16
17
18
19
20
21
22
23
24
2
3
4
5
6
7
8
9
10
11
12
13
14
15
16
17
18
19
20
21
22
23
24
3)打开侧滑栏重置表单
ts
const initPatient: Patient = {
  name: '',
  idCard: '',
  gender: 1,
  defaultFlag: 0
}
const patient = ref<Patient>({ ...initPatient })
1
2
3
4
5
6
7
2
3
4
5
6
7
diff
// 2. 打开侧滑栏
const show = ref(false)
const showPopup = () => {
+  patient.value = { ...initPatient }
  show.value = true
}
1
2
3
4
5
6
2
3
4
5
6
小结:
- 为什么使用计算属性 get set 写法?
- 组件需要的是 布尔 类型,需要通过计算属性转换一下
- 为什么要解构初始数据?
- 克隆一份新数据,要不然是同一个对象。
家庭档案-表单校验
实现:提交的时候校验表单,身份证需要校验格式
需求:
- 姓名,非空,2-18字符,身份证,非空,格式校验
- 保存的时候校验,整体校验
- 性别需要和身份证包含性别填写的一致,确认框提示
测试:
- 110101198307212600
- 110101196107145504
- 11010119890512132X
- 110101196501023433
- 110101197806108758
- 110101198702171378
- 110101198203195893
- 如有雷同纯属巧合,可删除。
代码:
1)姓名,非空,2-16字符 身份证,非空,格式校验
rules.ts
ts
const nameRules: FieldRule[] = [
  { required: true, message: '请输入姓名' },
  { pattern: /^(?:[\u4e00-\u9fa5·]{2,16})$/, message: '中文2-16个字符' }
]

const idCardRules: FieldRule[] = [
  { required: true, message: '请输入身份证号' },
  {
    pattern:
      /^[1-9]\d{5}(?:18|19|20)\d{2}(?:0[1-9]|10|11|12)(?:0[1-9]|[1-2]\d|30|31)\d{3}[\dXx]$/,
    message: '身份证号不正确'
  }
]

export { mobileRules, passwordRules, codeRules, nameRules, idCardRules }
1
2
3
4
5
6
7
8
9
10
11
12
13
14
15
2
3
4
5
6
7
8
9
10
11
12
13
14
15
PatientPage.vue
html
        <van-field
          v-model="patient.name"
          label="真实姓名"
          placeholder="请输入真实姓名"
          :rules="nameRules"
        />
        <van-field
          v-model="patient.idCard"
          label="身份证号"
          placeholder="请输入身份证号"
          :rules="idCardRules"
        />
1
2
3
4
5
6
7
8
9
10
11
12
2
3
4
5
6
7
8
9
10
11
12
2)保存的时候校验,整体校验 PatientPage.vue
ts
const form = ref<FormInstance>()
const onSubmit = async () => {
  await form.value?.validate()
  // 校验通过
}
1
2
3
4
5
2
3
4
5
3)性别需要和身份证包含性别填写的一致,确认框提示 PatientPage.vue
ts
const onSubmit = async () => {
  await form.value?.validate()
  // 身份证倒数第二位,单数是男,双数是女
  const gender = +patient.value.idCard.slice(-2, -1) % 2
  if (gender !== patient.value.gender) {
    await showConfirmDialog({
      title: '温馨提示',
      message: '填写的性别和身份证号中的不一致\n您确认提交吗?'
    })
  }
  console.log('通过校验')
}
1
2
3
4
5
6
7
8
9
10
11
12
2
3
4
5
6
7
8
9
10
11
12
提示:使用 any-rule 使用常用正则
家庭档案-添加患者
实现:患者的添加操作业务逻辑
步骤:
- 定义 api 函数,以及对应类型
- 实现添加患者业务
代码:
1)定义 api 函数
ts
import type { CodeType, Patient, PatientList, User, UserInfo } from '@/types/user'

// 添加患者信息
export const addPatient = (patient: Patient) => request('/patient/add', 'POST', patient)
1
2
3
4
2
3
4
2)实现添加患者业务
diff
+import { addPatient, getPatientList } from '@/services/user'

// ... 省略 ...

const submit = async () => {
  await form.value?.validate()
  // 身份证倒数第二位,单数是男,双数是女
  const gender = +patient.value.idCard.slice(-2, -1) % 2
  if (gender !== patient.value.gender) {
    await showConfirmDialog({
      title: '温馨提示',
      message: '填写的性别和身份证号中的不一致\n您确认提交吗?'
    })
  }

+  // 添加
+  await addPatient(patient.value)
+  show.value = false
+  loadList()
+  showSuccessToast('添加成功')
}
1
2
3
4
5
6
7
8
9
10
11
12
13
14
15
16
17
18
19
20
21
2
3
4
5
6
7
8
9
10
11
12
13
14
15
16
17
18
19
20
21
家庭档案-编辑患者
实现:患者的编辑操作业务逻辑
步骤:
- 打开对话框的时候,显示编辑患者信息界面
- 传入当前编辑的患者信息用于表单回显和界面展示
- 编写 api 函数
- 提交时候合并编辑请求
代码:
- 打开对话框,区分编辑和添加
html
<div class="patient-add" v-if="list.length < 6" @click="showPopup()">
1
html
<div @click="showPopup(item)" class="icon"><cp-icon name="user-edit" /></div>
1
ts
const showPopup = (item?: Patient) => {
  if (item) {
    // 如果点的是编辑,解构出后台需要的数据
    const { id, gender, name, idCard, defaultFlag } = item
    patient.value = { id, gender, name, idCard, defaultFlag }
  } else {
    patient.value = { ...initPatient }
  }
  show.value = true
}
1
2
3
4
5
6
7
8
9
10
2
3
4
5
6
7
8
9
10
diff
      <cp-nav-bar
        :back="() => (show = false)"
+        :title="patient.id ? '编辑患者' : '添加患者'"
        right-text="保存"
        @click-right="submit"
      ></cp-nav-bar>
1
2
3
4
5
6
2
3
4
5
6
- api 函数
ts
// 编辑患者信息
export const editPatient = (patient: Patient) => request('/patient/update', 'PUT', patient)
1
2
2
- 合并编辑患者请求
ts
import { addPatient, getPatientList, editPatient } from '@/services/user'
1
ts
const submit = async () => {
  await form.value?.validate()
  // 身份证倒数第二位,单数是男,双数是女
  const gender = +patient.value.idCard.slice(-2, -1) % 2
  if (gender !== patient.value.gender) {
    await showConfirmDialog({
      title: '温馨提示',
      message: '填写的性别和身份证号中的不一致\n您确认提交吗?'
    })
  }

  // 添加 & 修改
  patient.value.id ? await editPatient(patient.value) : await addPatient(patient.value)
  show.value = false
  loadList()
  showSuccessToast(patient.value.id ? '编辑成功' : '添加成功')
}
1
2
3
4
5
6
7
8
9
10
11
12
13
14
15
16
17
2
3
4
5
6
7
8
9
10
11
12
13
14
15
16
17
家庭档案-删除患者
实现:患者的删除操作业务逻辑
步骤:
- 准备按钮
- 定义API函数
- 点击删除,弹出确认框,确认删除
代码:
- 准备按钮
diff
      </van-form>
+      <van-action-bar>
+        <van-action-bar-button>删除</van-action-bar-button>
+      </van-action-bar>
    </van-popup>
1
2
3
4
5
2
3
4
5
scss
// 底部操作栏
.van-action-bar {
  padding: 0 10px;
  margin-bottom: 10px;
  .van-button {
    color: var(--cp-price);
    background-color: var(--cp-bg);
  }
}
1
2
3
4
5
6
7
8
9
2
3
4
5
6
7
8
9
- 定义API
ts
// 删除患者信息
export const delPatient = (id: string) => request(`/patient/del/${id}`, 'DELETE')
1
2
2
- 点击删除,弹出确认框,确认删除
html
      <van-action-bar v-if="patient.id">
        <van-action-bar-button @click="remove">删除</van-action-bar-button>
      </van-action-bar>
1
2
3
2
3
ts
import { addPatient, getPatientList, editPatient, delPatient } from '@/services/user'
// ... 省略 ...
const remove = async () => {
  if (patient.value.id) {
    await showConfirmDialog({
      title: '温馨提示',
      message: `您确认要删除 ${patient.value.name} 患者信息吗 ?`
    })
    await delPatient(patient.value.id)
    show.value = false
    loadList()
    showSuccessToast('删除成功')
  }
}
1
2
3
4
5
6
7
8
9
10
11
12
13
14
2
3
4
5
6
7
8
9
10
11
12
13
14